Model Assisted Labeling
Use Foundry to optimize labeling data
Enableing Model Assisted Labeling
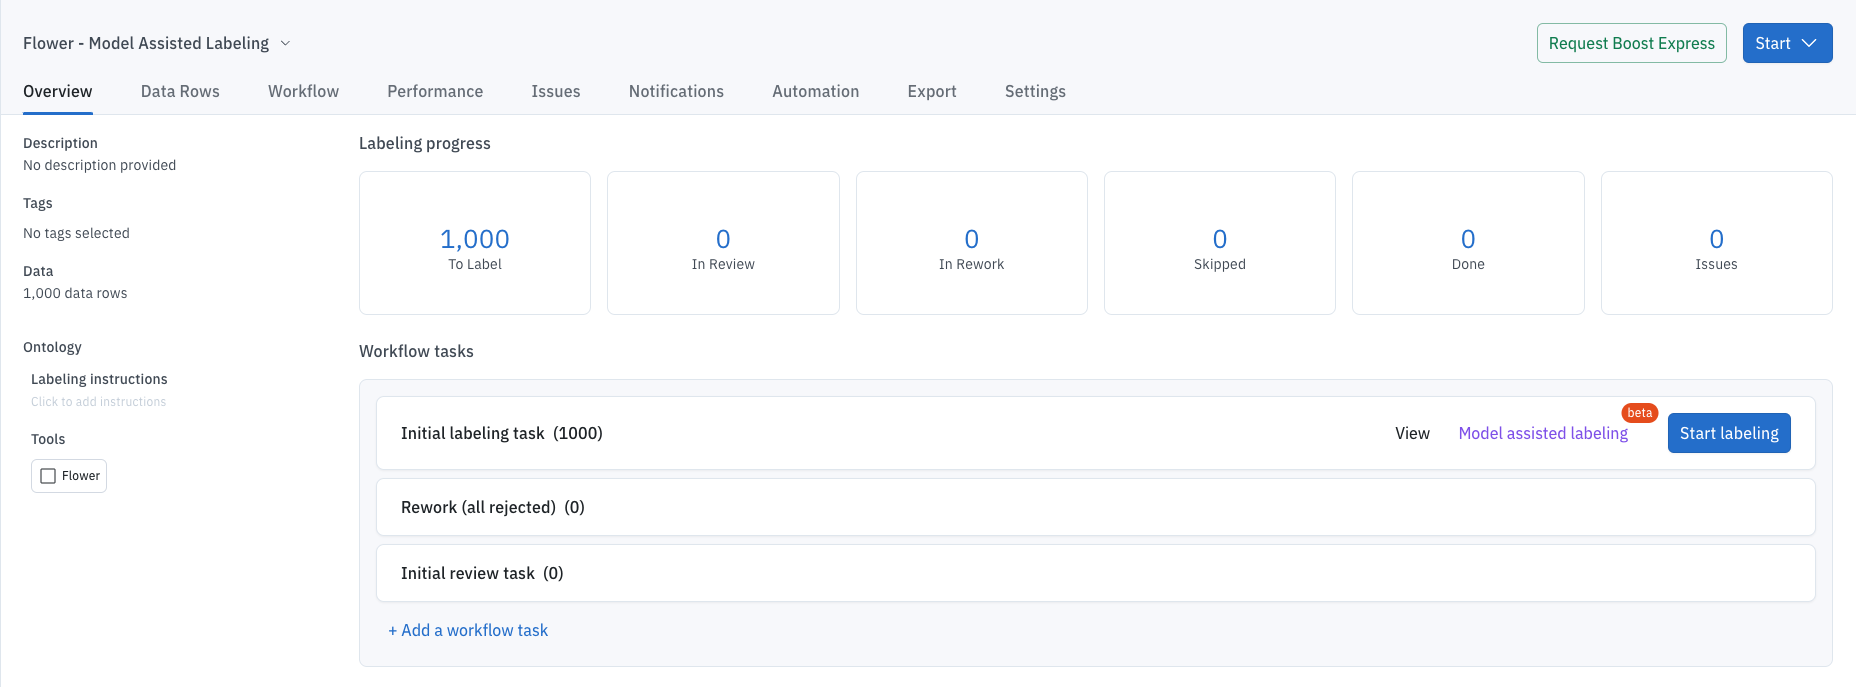
Step 1: Set up a new project
To begin working with Model Assisted Labeling, you must create a project with an ontology and a batch of data compatible with Foundry.
After setting up the project, you'll notice a button labeled 'Model Assisted Labeling' next to the 'Start Labeling' button.
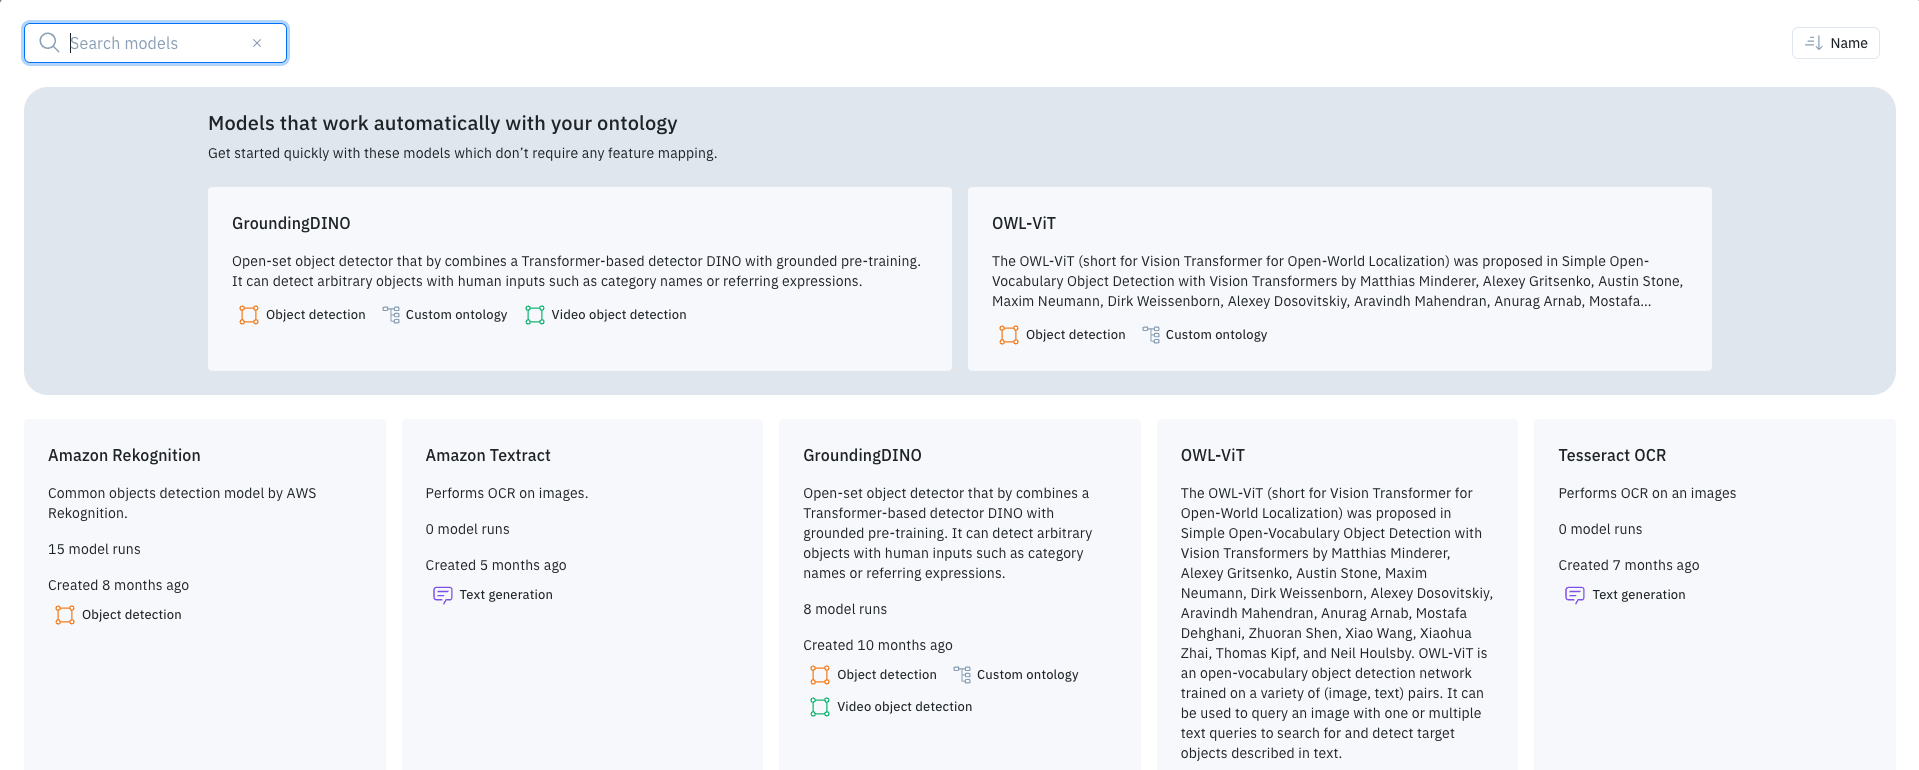
Step 2: Choose Model
After selecting 'Model Assisted Labeling,' a page will appear, prompting you to choose the model you'd like to use. In the screenshot below, there are seven models available. The two models at the top offer the easiest setup, while the remaining five are also capable of performing the task.
Step 3: Configure the Model
After selecting a model, such as OWL-ViT in this case, you can align the model with the ontology and set the Confidence Threshold value. In scenarios where the ontology is open-ended, users can input their desired criteria, akin to prompt engineering.
- Confidence Threshold: Determines the minimum level of certainty required for the model to make predictions
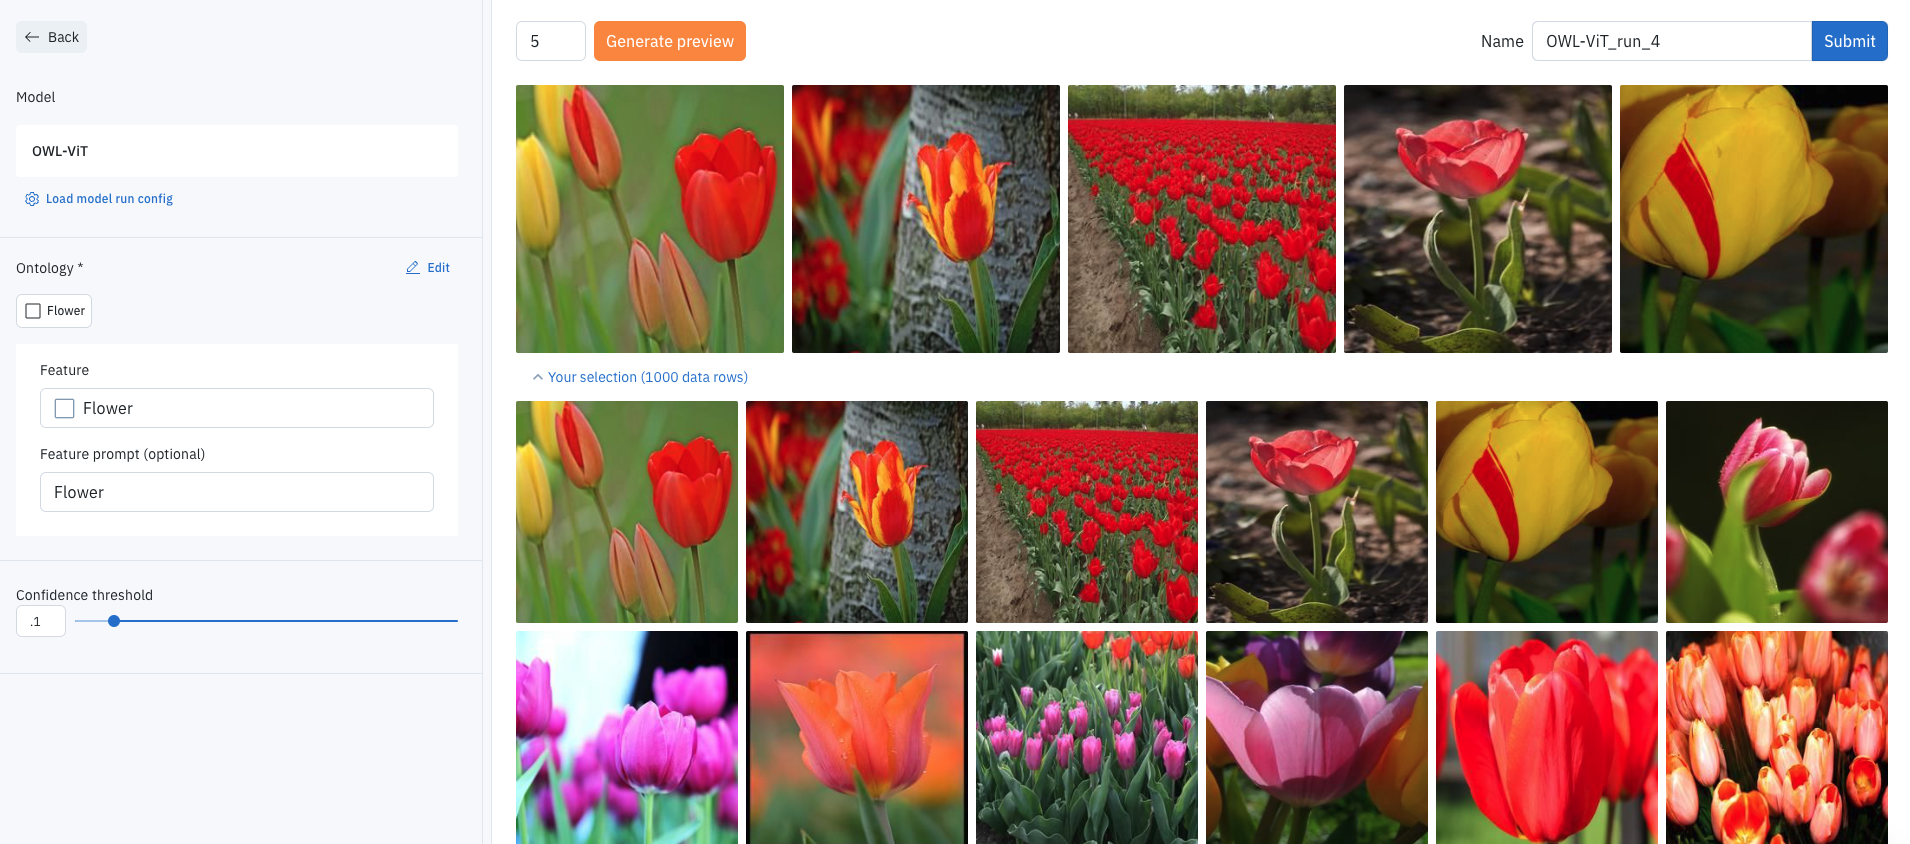
Step 4: Previewing Selected Model
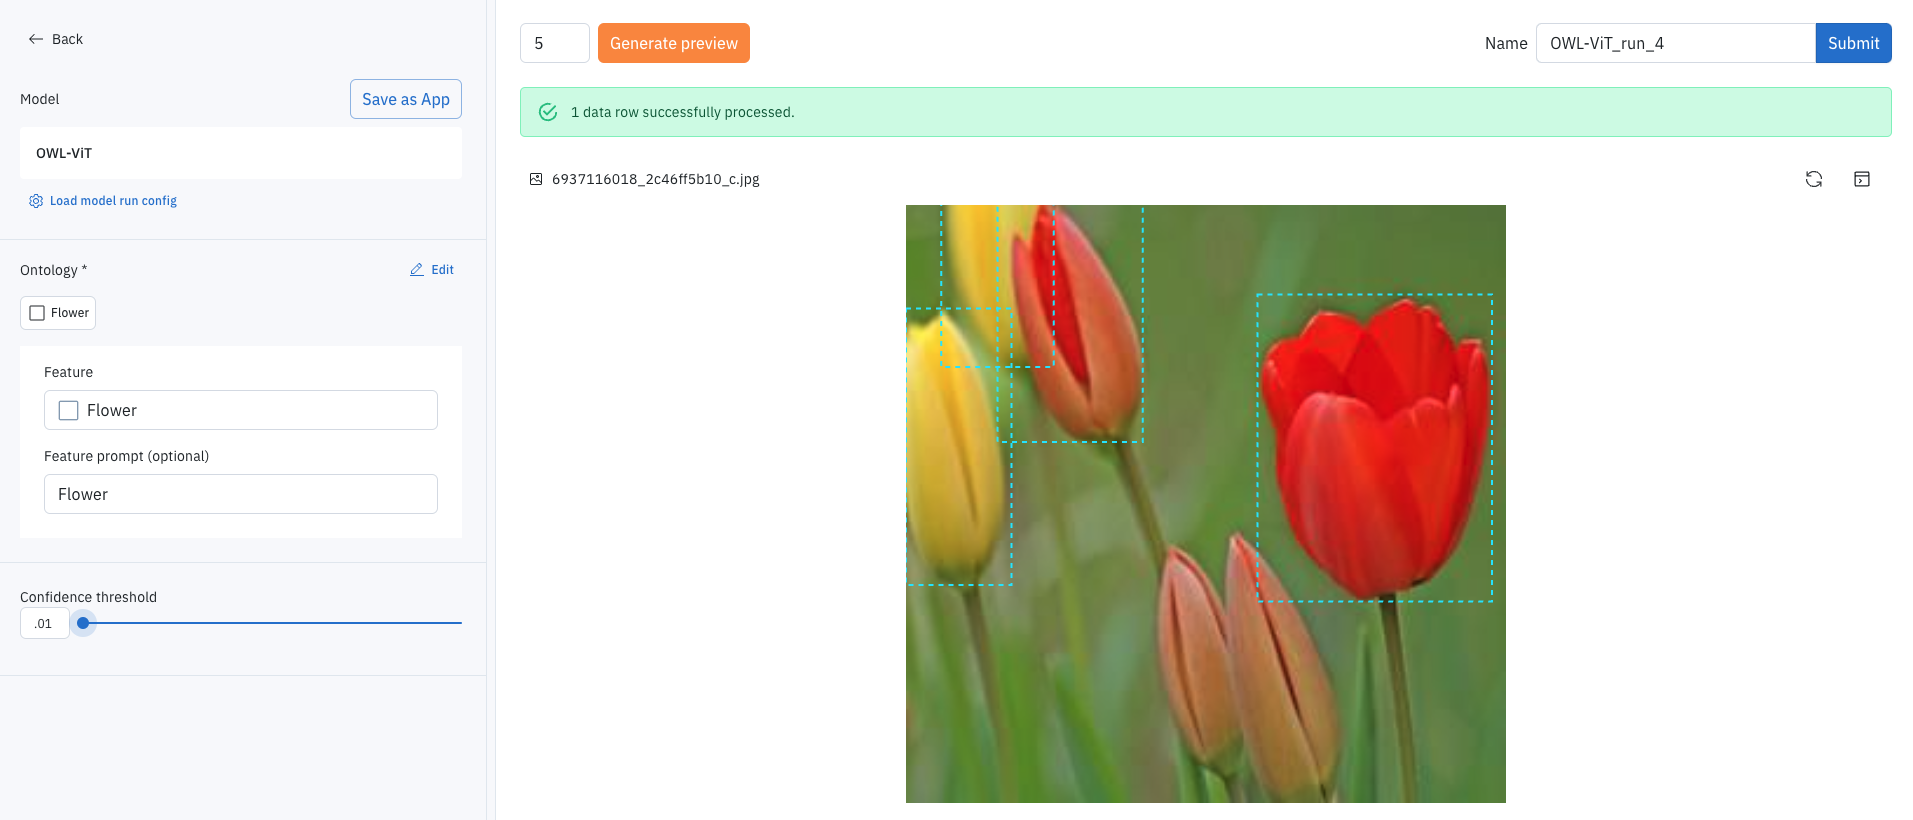
After selecting a model, you have the option to choose 'Generate Preview.' This initiates the model to process a subset of selected data rows, providing a preview of its accuracy. During this preview, you can adjust the Confidence Threshold to an appropriate level. Additionally, annotations can be highlighted, revealing the tool being used and the model's confidence in each annotation.
If the annotations are inaccurate or if the model isn't functioning as expected, you can navigate back, select a different model, and repeat the process.
If the model is functioning correctly, select Submit.
Step 5: Submitted Model Run
After submitting the model, a notification will appear, indicating that the model is now running. You can track the project's progress in the notification tab located on the bottom left side of the page.
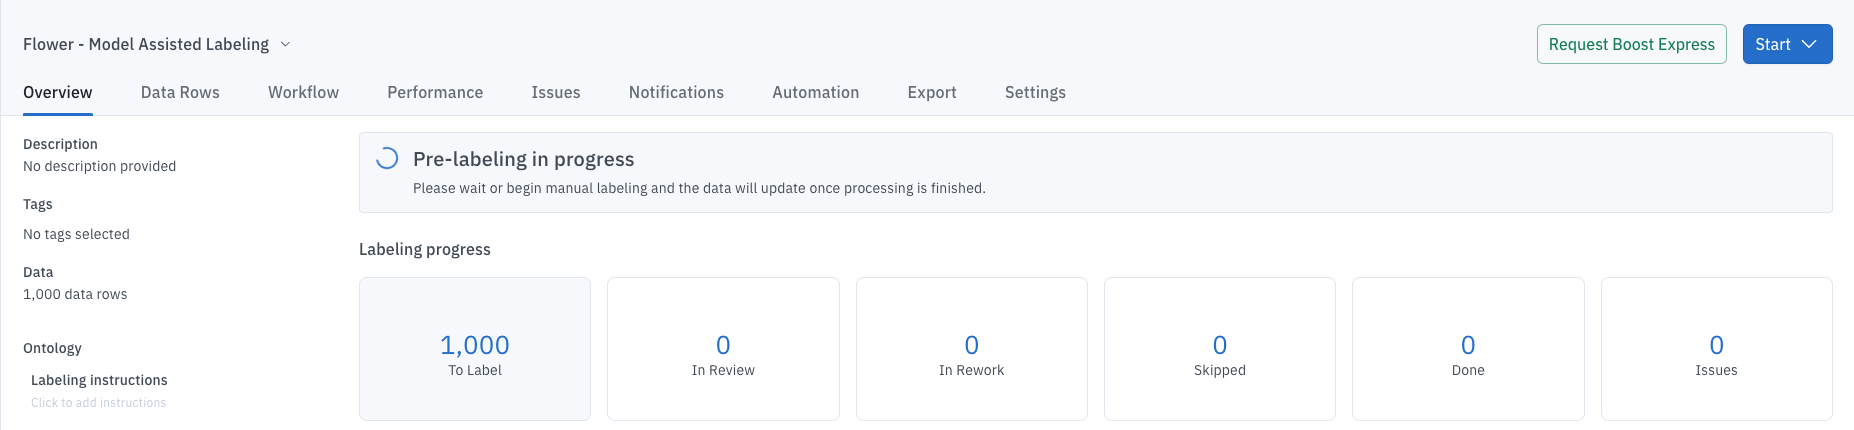
When completed, the results will be shown both in the notification tab and the project.

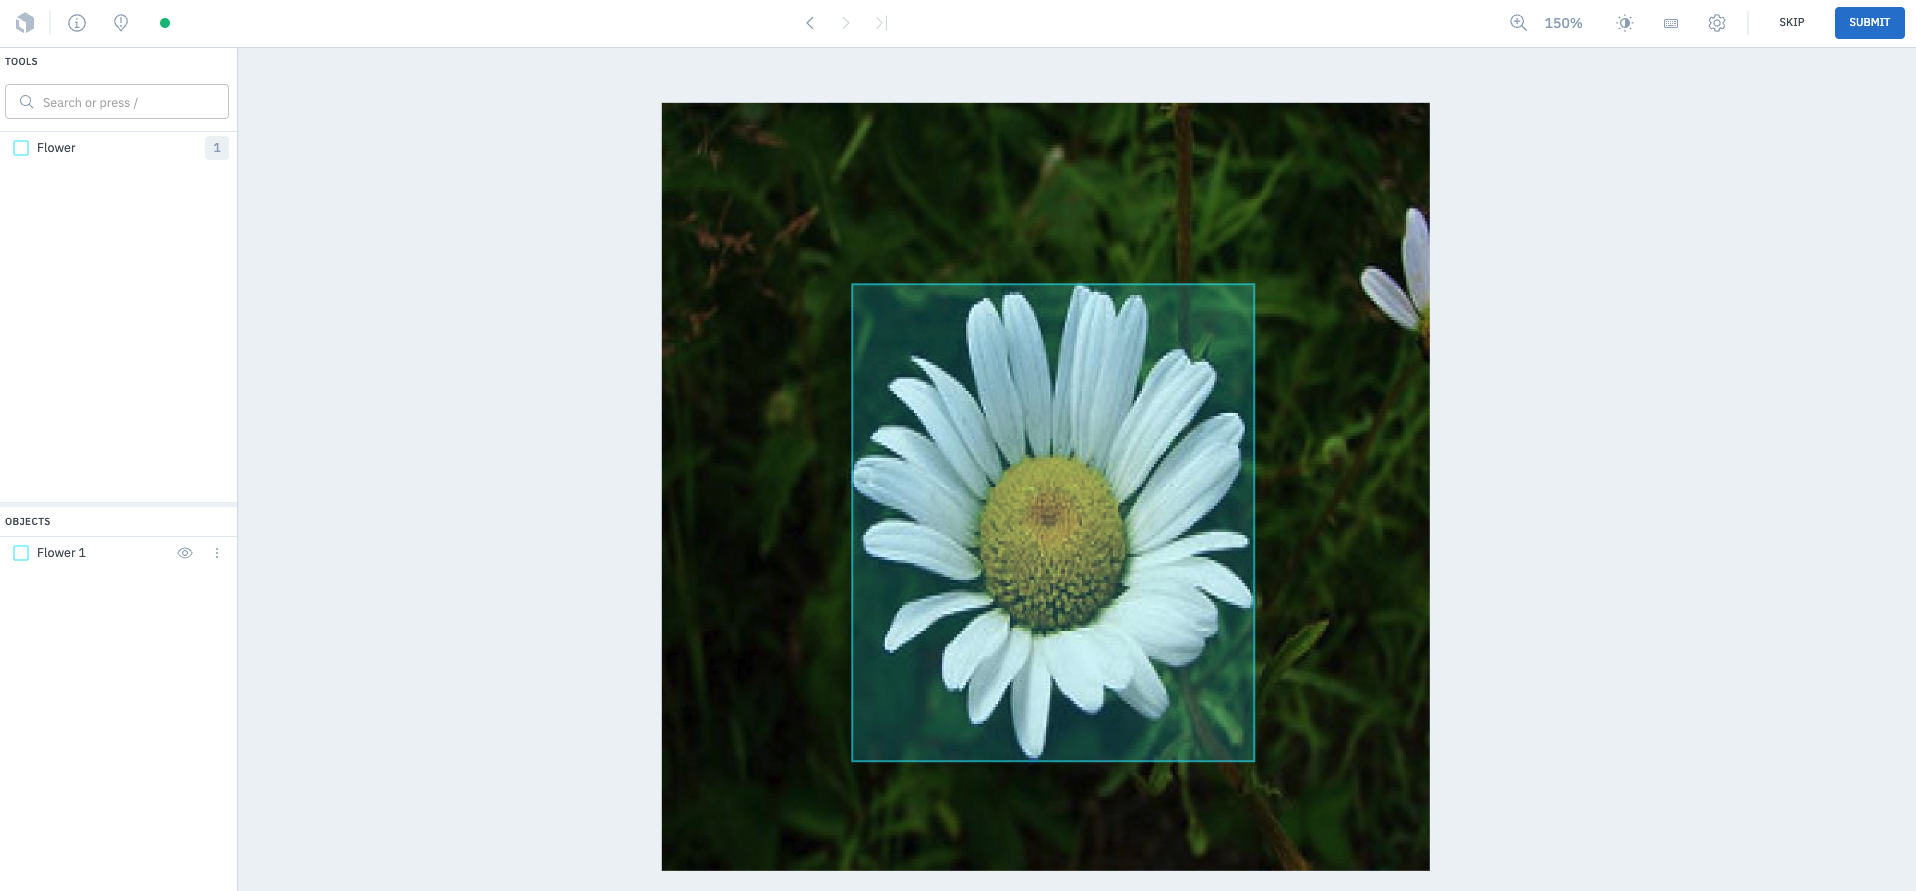
Step 6: Happy Labeling!
Once completed, the annotations will be superimposed onto the data rows for labelers to either Submit or remove and create their own annotations.
Updated 13 days ago